An email blacklist check is essential when your Salesforce org experiences sudden drops in email deliverability. When email service providers flag your sending IP address or domain as suspicious, your messages land in spam folders instead of recipient inboxes. This guide covers how to perform thorough blacklist checks and restore healthy email delivery from your Salesforce environment.
What Is an Email Blacklist Check
Email blacklist databases track IP addresses and domains that send suspicious or unwanted messages. Major email providers like Gmail, Outlook, and Yahoo reference these databases to filter incoming mail. When your Salesforce org’s sending infrastructure appears on these lists, email deliverability drops significantly.
Blacklists operate using different criteria:
- IP-based blocking: Targets specific server addresses
- Domain-based blocking: Blocks entire email domains
- Content-based filtering: Analyzes message patterns and sender behavior
- Reputation scoring: Combines multiple factors to assess sender trustworthiness
Is My Email Domain Blacklisted: Warning Signs
Several indicators suggest your Salesforce org may be experiencing blacklist issues:
Deliverability Metrics Changes
- Email open rates drop below 15% (industry average is 20-25%)
- Bounce rates exceed 5% for established contact lists
- Spam complaint rates rise above 0.1%
- Unsubscribe rates increase without campaign changes
Technical Indicators
- SMTP error codes 550, 554, or 421 in email logs
- Delayed message delivery beyond normal timeframes
- Recipient servers rejecting connections entirely
- Authentication failures for SPF, DKIM, or DMARC records

How to Check If Your Email Domain Has Been Blacklisted
Multiple methods exist to verify blacklist status for your Salesforce org’s email infrastructure:
Direct Blacklist Database Queries
Query major blacklist providers directly using your sending IP address or domain:
- Spamhaus: Check SBL, CSS, and PBL databases
- Barracuda: Query BRBL for reputation scores
- SURBL: Verify domain-based listings
- URIBL: Check URI-based blacklists
Multi-Database Checking Tools
Use comprehensive tools that query multiple blacklists simultaneously:
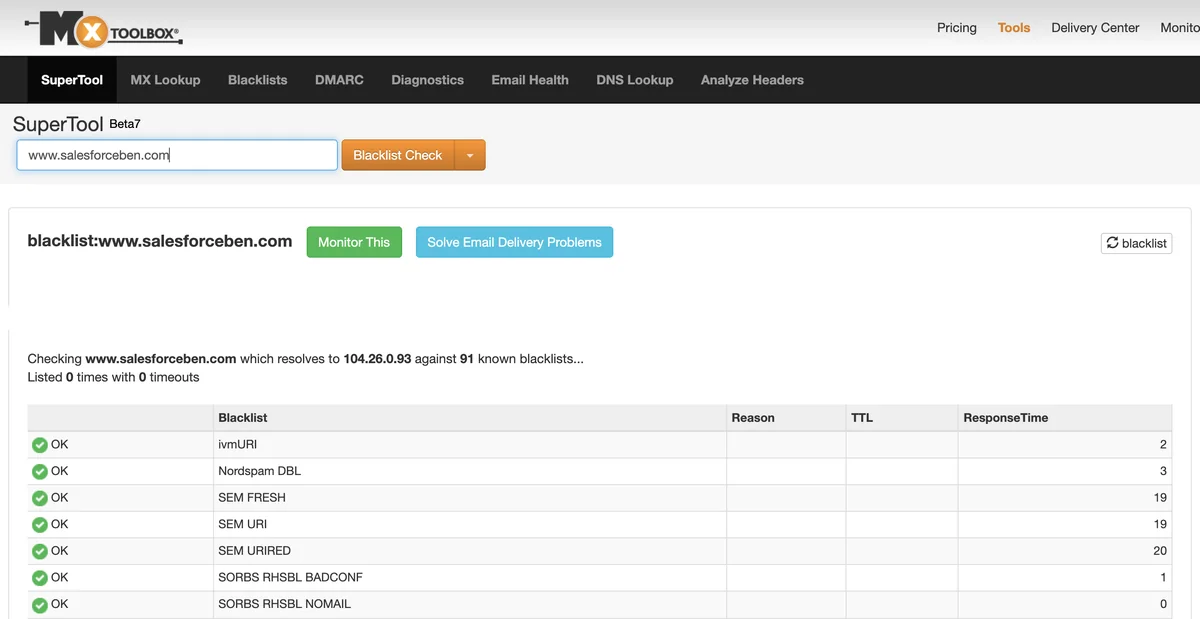
- MXToolbox Blacklist Check
- MultiRBL.valli.org
- WhatIsMyIPAddress.com
- DNSstuff.com
Salesforce-Specific Monitoring
Within your Salesforce org, monitor these areas for blacklist indicators:
- Email Deliverability Dashboard: Track bounce rates and delivery failures
- Email Log Files: Review SMTP response codes in Setup > Email Administration
- Campaign Performance: Compare current metrics to historical baselines
- Email Studio Reports: Analyze send performance in Marketing Cloud
Check Domain Black List: Technical Implementation
For Salesforce administrators managing email infrastructure, implement systematic blacklist monitoring:
Automated Monitoring Setup
Create scheduled checks using external monitoring services or custom Apex code:
public class BlacklistMonitor {
    @future(callout=true)
    public static void checkBlacklistStatus(String ipAddress) {
        // Query multiple blacklist APIs
        HttpRequest req = new HttpRequest();
        req.setEndpoint('https://api.blacklistcheck.com/v1/check?ip=' + ipAddress);
        req.setMethod('GET');
        req.setTimeout(10000);

        Http http = new Http();
        HttpResponse res = http.send(req);

        if (res.getStatusCode() == 200) {
            // Parse response and create case if blacklisted
            Map result = (Map) JSON.deserializeUntyped(res.getBody());
            if ((Boolean) result.get('isBlacklisted')) {
                createBlacklistAlert((String) result.get('database'));
            }
        }
    }

    private static void createBlacklistAlert(String database) {
        Case alertCase = new Case(
            Subject = 'Email Blacklist Alert: ' + database,
            Priority = 'High',
            Status = 'New',
            Origin = 'System Alert'
        );
        insert alertCase;
    }
}
DNS-Based Blacklist Queries
Many blacklists support DNS-based lookups for programmatic checking:
// Example DNS query format for Spamhaus SBL
// Reverse IP: 192.168.1.1 becomes 1.1.168.192.sbl.spamhaus.org
// Response: 127.0.0.2 indicates listing
Blacklist Removal and Prevention
Once you identify blacklist issues, take immediate action to restore deliverability:
Immediate Response Steps
- Identify root cause: Review recent email campaigns for policy violations
- Fix authentication: Ensure SPF, DKIM, and DMARC records are properly configured
- Clean contact lists: Remove invalid addresses and inactive subscribers
- Review content: Eliminate spam trigger words and suspicious formatting
Removal Request Process
Each blacklist provider has specific removal procedures:
- Automatic removal: Some lists remove entries after 24-48 hours of clean sending
- Self-service removal: Online forms for immediate delisting requests
- Manual review: Submit detailed explanations for human evaluation
- Paid expedited removal: Some services offer faster processing for fees
Long-term Prevention Strategies
Implement ongoing practices to maintain good sender reputation:
- Monitor engagement metrics weekly
- Implement double opt-in for new subscribers
- Segment lists based on engagement levels
- Gradually increase sending volume for new IP addresses
- Maintain consistent sending patterns
- Respond promptly to abuse complaints
Salesforce Email Deliverability Best Practices
Within Salesforce environments, follow these specific guidelines:
Marketing Cloud Configuration
- Configure dedicated IP addresses for high-volume sending
- Implement IP warming schedules for new addresses
- Use sender authentication packages (SAP) for domain alignment
- Monitor Sender Reputation Dashboard regularly
Sales Cloud Email Settings
- Configure organization-wide email addresses properly
- Set appropriate email relay settings in Setup
- Monitor email limits and governor limits
- Use email templates with proper formatting
Pardot/Account Engagement Considerations
- Maintain clean prospect databases
- Use progressive profiling to reduce form abandonment
- Implement proper list hygiene practices
- Monitor engagement scoring and grading
Common Blacklisting Scenarios in Salesforce
Understanding typical blacklisting situations helps prevent future issues:
Bulk Email Campaigns
Large-scale email sends can trigger blacklist algorithms if not properly managed:
- Send volume spikes without proper IP warming
- High bounce rates from outdated contact lists
- Spam complaints from purchased or rented lists
- Content that triggers automated filters
Transactional Email Issues
Even automated emails can cause blacklist problems:
- Password reset emails with suspicious formatting
- Order confirmations sent to invalid addresses
- System notifications with poor authentication
- API-generated emails without proper headers
Third-Party Integration Problems
External systems connecting to Salesforce may introduce risks:
- Marketing automation tools with poor reputation
- Email service providers with shared IP issues
- Custom integrations without proper error handling
- Legacy systems with outdated authentication methods
Frequently Asked Questions
How often should I perform an email blacklist check?
Perform email blacklist checks weekly for active sending domains, and immediately after any significant changes to email infrastructure or campaign strategies. High-volume senders should implement automated daily monitoring.
Can Salesforce IP addresses get blacklisted?
Yes, both shared and dedicated Salesforce IP addresses can be blacklisted. Shared IPs are more vulnerable due to other customers’ sending practices, while dedicated IPs give you more control but require proper warming and maintenance.
What’s the difference between temporary and permanent blacklisting?
Temporary blacklisting typically lasts 24-72 hours and resolves automatically with good sending behavior. Permanent blacklisting requires manual removal requests and demonstrates more serious policy violations or security concerns.
How do I prevent my Salesforce org from getting blacklisted?
Maintain clean contact lists, implement proper email authentication (SPF, DKIM, DMARC), monitor engagement metrics, avoid spam trigger words, and follow email marketing best practices. Regular list hygiene and engagement-based segmentation are crucial.
What should I do if removal requests are denied?
If blacklist removal requests are denied, review and address the specific reasons provided. This may require implementing additional security measures, waiting longer between attempts, or working with email deliverability consultants to resolve underlying issues.