Web to Lead Salesforce creates Lead records from an HTML form hosted on a public website. An administrator enables the feature, selects the Lead fields, generates the form markup, configures ownership and response behavior, and tests the submission path before publishing it.
This guide explains the native setup, generated HTML, assignment behavior, spam controls, validation failures, daily limits, and the point at which an API-based integration is a better design.
What is Web to Lead Salesforce?
Web-to-Lead is a standard lead-ingestion channel for Salesforce. The browser posts form values to a Salesforce endpoint, Salesforce attempts to create a Lead, and the visitor is redirected to the configured return URL. The feature is available in Lightning Experience and Salesforce Classic in supported Sales Cloud editions.
The feature fits a simple request-response flow: collect contact data, create one Lead, route it, and optionally send an auto-response. It is not a form builder, marketing automation platform, file service, or general-purpose API.
| Requirement | Native Web-to-Lead fit | Use another pattern when |
|---|---|---|
| Create one Lead from a public form | Good fit | You must create several related records atomically |
| Route by geography, product, or company size | Use an active lead assignment rule | Routing depends on external systems or long-running checks |
| Acknowledge the submitter | Use lead auto-response rules or the default response template | The response needs transactional data from other services |
| Prevent basic bot submissions | Use the supported reCAPTCHA option | You need risk scoring, rate limits, or custom fraud controls |
| Upload files | Not a native Web-to-Lead workflow | Use a secured application and authenticated integration |
| Handle more than the documented daily limit | Not the preferred pattern | Use middleware or an application that queues API requests |
What should you configure before creating the form?
Prepare the data and routing design before generating HTML. A production form often fails because the Lead object contains required fields, validation rules, duplicate rules, or restricted picklists that the website does not satisfy.
- Lead fields: Decide which standard and custom fields the website can populate. Avoid collecting fields that the sales process does not use.
- Field-level design: Confirm field types, picklist values, maximum lengths, required fields, and default values.
- Default lead creator: Salesforce states that this user needs Modify All Data, Send Email, and Access Activities.
- Default lead owner: Configure Lead Settings so unmatched records have a valid owner.
- Assignment rule: Create and activate one lead assignment rule when routing must depend on submitted values.
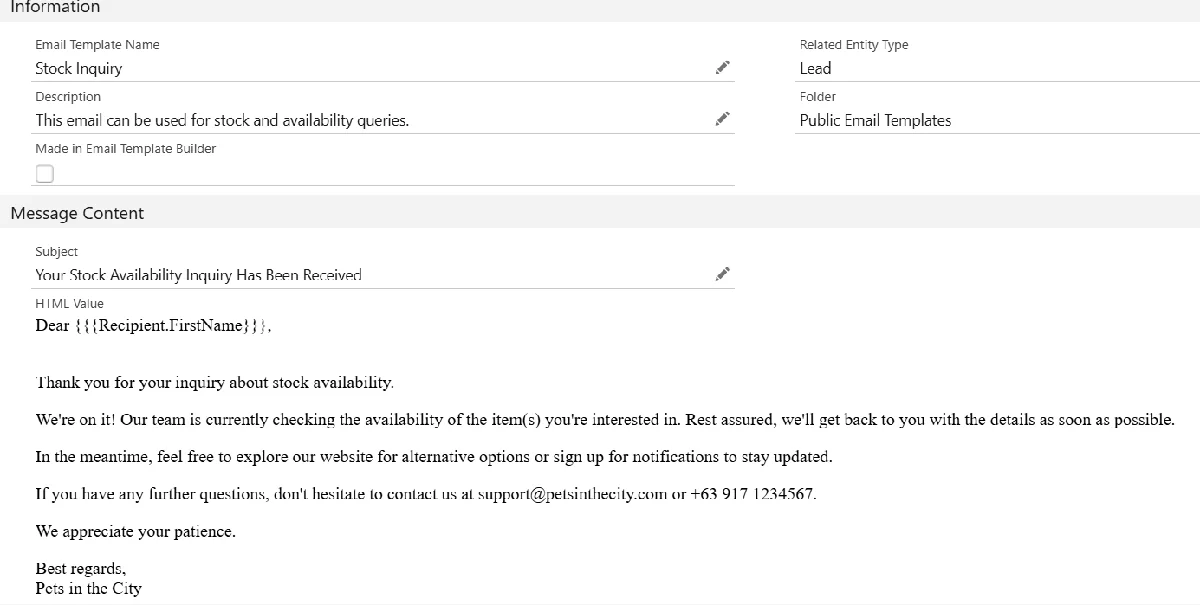
- Auto-response: Prepare an email template and rule criteria. Do not place sensitive submitted data in an email response.
- Return page: Publish a stable HTTPS thank-you page. The redirect is not proof that every downstream sales process completed.
- Spam controls: Enable the supported reCAPTCHA option where it is available and allowed in the target region.
For related routing concepts, review Salesforce lead management and Salesforce assignment rules.
How to create Web to Lead Salesforce settings
- Open Setup.
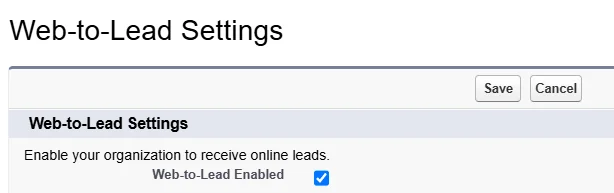
- Enter Web-to-Lead in Quick Find and select Web-to-Lead.
- Click Edit.
- Enable Web-to-Lead.
- Keep Require reCAPTCHA Verification enabled unless your implementation has a documented reason not to use it.
- Select the default lead creator.
- Select the default response template if your org uses one.
- Save the settings.
The administrative permission required to configure the feature is Customize Application. Keep the default lead creator active and licensed. A deactivated integration identity can turn a form problem into an ownership and email problem.
SFDC Web to Lead ownership flow
For an SFDC Web to Lead submission, separate the creator from the owner. The default lead creator is the identity Salesforce records for the web-generated record and uses for operational notifications. The Lead owner is determined by the active assignment rule or, when no rule assigns the record, by the default lead owner.
In enterprise orgs, use a queue for unqualified inbound leads and assign users only after required enrichment or qualification. This prevents a website form from sending low-quality records directly to account executives.
How to create a Web to Lead form in Salesforce
The following procedure answers how to create a web to lead form in Salesforce without relying on hand-written field identifiers.
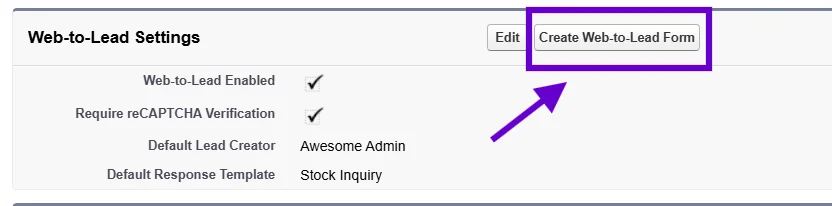
- Return to the Web-to-Lead setup page.
- Click Create Web-to-Lead Form.
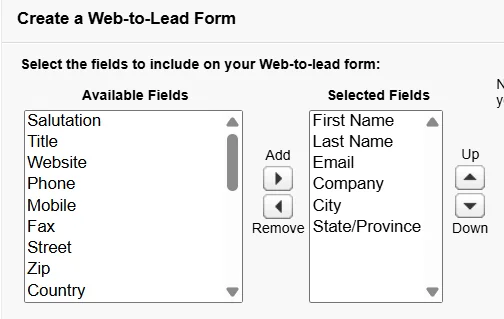
- Move the required Lead fields into Selected Fields.
- Choose a Campaign when the form should associate new leads with a campaign.
- Enter the full HTTPS return URL.
- Provide the reCAPTCHA values requested by the setup page when verification is enabled.
- Generate the HTML.
- Copy the generated markup into a controlled source file and commit it to the website deployment process.
Salesforce Web to Lead form field selection
A Salesforce Web to Lead form can include standard and supported custom Lead fields. Keep the public form small, and collect only information needed for routing or first contact. Additional data can be collected after consent through a secured follow-up process.
Use hidden inputs only for controlled values such as a campaign, lead source, product code, or form version. A hidden input is visible to anyone who inspects the page and can be changed before submission. Treat every submitted value as untrusted.
Web lead field design
A web lead should include enough information to route and contact the prospect, but not every field on the Lead object. A common baseline is first name, last name, company, email, phone, country, product interest, consent state, and a hidden source value.
| Field | Public form guidance | Salesforce control |
|---|---|---|
| Last Name | Include because Lead creation normally requires it | Required standard field |
| Company | Include for business lead processes | Required in standard B2B Lead behavior unless org design differs |
| Use browser validation for convenience, not as the only control | Add a Lead validation rule when format or domain policy matters | |
| Lead Source | Set a controlled hidden value per form | Use a restricted picklist when governance requires it |
| Product Interest | Use an allow-listed value | Map to a custom picklist and assignment criteria |
| Consent | Use explicit wording and store the evidence required by policy | Use dedicated fields; do not infer consent from submission alone |
What does the generated HTML contain?
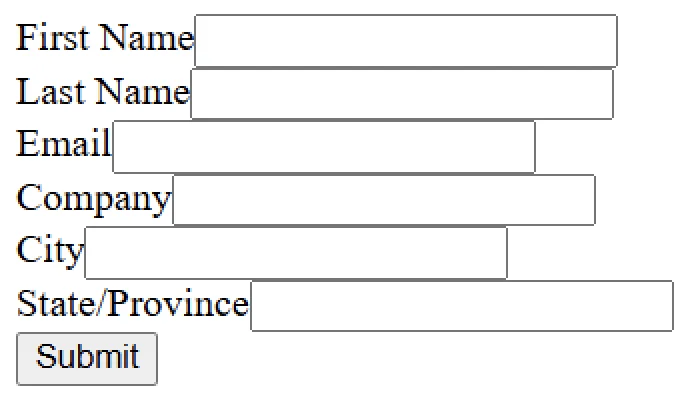
Salesforce generates a normal HTML form with a Salesforce action URL, hidden organization and return URL values, labels, and inputs whose names map to Lead fields. Use the generated output from your org as the source of truth because custom field identifiers differ between orgs.
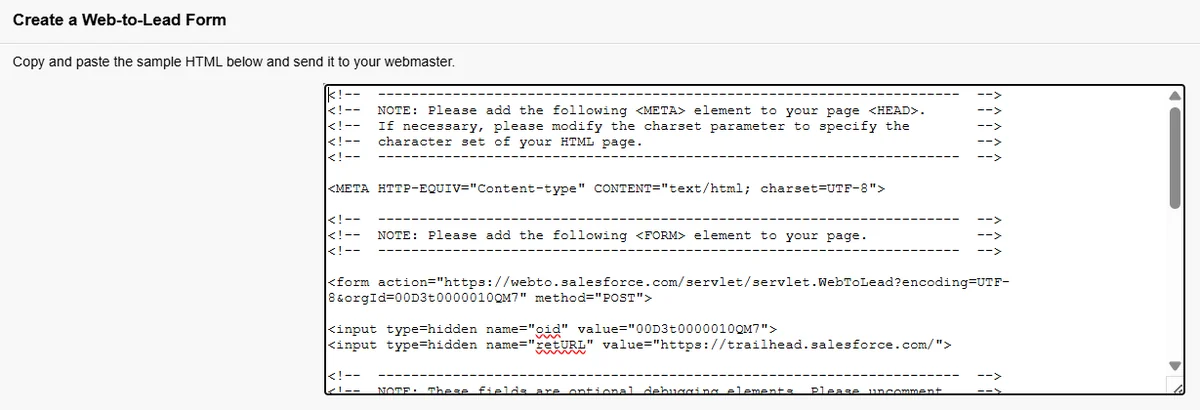
The following example shows the structure. Replace every placeholder with values generated by your Salesforce org. Do not copy a custom field identifier from another environment.
<form action="https://webto.salesforce.com/servlet/servlet.WebToLead?encoding=UTF-8"
      method="POST">
  <!-- Values below must come from the generated form in your org. -->
  <input type="hidden" name="oid" value="YOUR_ORG_ID" />
  <input type="hidden" name="retURL"
         value="https://www.example.com/thank-you/" />

  <label for="first_name">First name</label>
  <input id="first_name" name="first_name" type="text" maxlength="40" />

  <label for="last_name">Last name</label>
  <input id="last_name" name="last_name" type="text"
         maxlength="80" required />

  <label for="company">Company</label>
  <input id="company" name="company" type="text"
         maxlength="40" required />

  <label for="email">Work email</label>
  <input id="email" name="email" type="email"
         maxlength="80" required />

  <input type="hidden" name="lead_source" value="Website" />

  <button type="submit">Submit</button>
</form>
Security note: client-side required, pattern checks, and JavaScript improve the user experience but do not protect Salesforce data. A caller can bypass the page and post values directly. Enforce record policy with Salesforce validation, duplicate management, controlled picklists, assignment rules, and monitoring.
How should you test a Salesforce Web to Lead form?
Test in a sandbox or with a clearly identified test source before sending traffic to production. Generated markup can include a commented debug input. Salesforce documents the following hidden input for a debugging response:
<input type="hidden" name="debug" value="1" />Use debug mode only while diagnosing the form. Remove or comment out the debug input before launch. Salesforce also documents that leaving debug code enabled can cause the default lead creator to receive an email for each generated record.


Test checklist for a web lead
- Submit a valid record for each assignment-rule branch.
- Verify Lead owner, creator, status, source, campaign membership, and custom fields.
- Confirm the expected auto-response and sender behavior.
- Submit invalid picklist, missing required-field, and validation-rule cases.
- Test a known duplicate against each active duplicate rule.
- Confirm the return page works on success and that website analytics do not record sensitive form values.
- Test mobile keyboard behavior, labels, error messages, tab order, and screen-reader names.
- Check that reCAPTCHA works in each target region and browser policy.
How do assignment, response, validation, and duplicate rules interact?
Web-to-Lead is only the entry point. The Lead record must also pass the org’s data controls.
- Assignment rules: The active lead assignment rule can route the Lead to a user or queue. Keep criteria mutually understandable and test ordering because the first matching rule entry determines the assignment.
- Auto-response rules: Criteria determine which response template is sent. The default response template is used when configured behavior falls through according to the org’s setup.
- Validation rules: A rule can reject a submission that the browser accepted. Review required dependencies, country/state logic, restricted picklists, and conditional requirements.
- Duplicate rules: Blocking duplicate rules can prevent creation of matching web-generated leads. Do not bypass duplicate management globally merely to make the form pass.
- Record-triggered automation: Flows and Apex triggers that run after Lead creation must be bulk-safe even though a visitor submits one form at a time. Other channels can insert Leads in bulk.
For automation design, see Salesforce Flow. For duplicate controls, see Salesforce duplicate rules.
What are the Web-to-Lead limits and design constraints?
Salesforce documents a limit of 500 Web-to-Lead requests per day. When the org exceeds the limit, the default lead creator receives an email. Treat 500 as a hard architecture checkpoint rather than a target operating level.
Additional constraints affect production design:
- The generated form is a public endpoint, so bots can discover and call it.
- The browser cannot keep hidden fields secret.
- Native Web-to-Lead is intended to create Lead records, not arbitrary custom-object graphs.
- It does not provide a native file-upload transaction for the Lead form.
- Server-side enrichment, retries, idempotency, and detailed observability require a separate integration layer.
- Date, currency, locale, picklist, and validation behavior must match the destination org.
Salesforce does not present Web-to-Lead as an API-versioned feature, so an Apex API version such as v65.0 is not a setup prerequisite. Release updates can still change surrounding security, UI, and platform behavior; retest generated forms during each release cycle.
Best practices for Web to Lead Salesforce implementations
- Generate markup per environment. Production and sandbox organization IDs and custom field IDs differ.
- Use a form version field. A hidden controlled value helps trace which page and deployment produced a Lead.
- Set a specific Lead Source. Do not rely on users to infer whether a record came from the website.
- Route to a queue first. This works well when qualification or enrichment occurs before named ownership.
- Keep automation bulkified. Avoid SOQL and DML inside loops in any Apex trigger invoked by Lead creation.
- Enforce CRUD and field access in custom code. Any Apex, LWC, or API service added around the process must apply the security model appropriate to its execution context.
- Monitor failures and volume. Track submissions at the website, created Leads in Salesforce, assignment outcomes, and response-email failures without logging sensitive values.
- Use an integration for complex intake. A server or middleware layer is better for files, multi-object writes, enrichment, consent evidence, retries, or volumes near the daily limit.
Common errors with a Salesforce Web to Lead form
| Symptom | Likely cause | Correction |
|---|---|---|
| No Lead appears | Feature disabled, wrong org ID, validation failure, duplicate block, or reCAPTCHA issue | Enable debug temporarily and review each data rule |
| Lead has the wrong owner | Assignment criteria did not match or rule is inactive | Verify the active rule, entry order, submitted values, and default owner |
| Picklist value is blank or rejected | HTML option does not match the Salesforce value | Use the stored picklist value and retest restricted picklists |
| Default creator receives repeated emails | Debug input remains enabled | Remove or comment the debug input before publishing |
| Duplicate submissions fail | Active duplicate rule blocks the record | Review the matching and duplicate-rule policy; do not disable it without approval |
| Form works in one org only | Org ID or custom field IDs were copied between environments | Generate and configure the form separately in each org |
When should you replace Web-to-Lead with an API integration?
Use an authenticated API integration when the intake process requires more control than a public HTML post can provide. Typical triggers are more than 500 requests per day, burst traffic, file uploads, custom objects, several related records, external enrichment, idempotency, retry queues, detailed error handling, or server-side secrets.
A common enterprise pattern is website to application service, application service to queue, and queue worker to Salesforce REST or Bulk API. The service validates an allow-list of fields, stores a request identifier, retries transient failures, and records the Salesforce Lead ID. This costs more to build but provides operational control that the native form does not expose.
For integration options, review Salesforce REST API.
Official Salesforce references
- Salesforce Help: Web-to-Lead setup
- Salesforce Help: considerations for generating leads
- Salesforce Help: test a Web-to-Lead page
Frequently Asked Questions
What is Web-to-Lead in Salesforce?
Web-to-Lead is a native Salesforce lead-capture feature. It accepts an HTML form submission, creates a Lead record, applies configured lead assignment and auto-response rules, and redirects the visitor to the form’s return URL.
How many Web-to-Lead submissions can Salesforce process per day?
Salesforce documents a limit of 500 Web-to-Lead requests per day. The default lead creator receives an email when the org exceeds the limit. Organizations that expect larger or bursty volumes should use an integration pattern that can queue, validate, retry, and monitor requests.
Why is my Salesforce Web-to-Lead form not creating leads?
Check that Web-to-Lead is enabled, required Lead fields are included, validation and duplicate rules permit the record, the organization ID is correct, and reCAPTCHA is configured. Add the generated debug hidden input only during testing, then remove or comment it before publishing.
Can Web-to-Lead upload files or create records on custom objects?
The generated Web-to-Lead form creates Lead records and does not provide a native file-upload workflow. For files, custom objects, complex transactions, or server-side enrichment, submit to your own service and call Salesforce through an authenticated API.
Do lead assignment rules run for Web-to-Lead submissions?
Web-generated leads can be evaluated by the active lead assignment rule. If no assignment rule assigns the record, Salesforce uses the default lead owner configured in Lead Settings. Test each routing branch with controlled submissions before launch.