Force.com IDE
What is Force.com IDE? It is powerful tool, which is used to create/modify & deploying Salesforce applications.
How to install force.com IDE?
- Install Java SE Development kit (JDK), Runtime environment – Force.com plug in will fail to load if you don’t have the full Java JDK.
- Install eclipse.
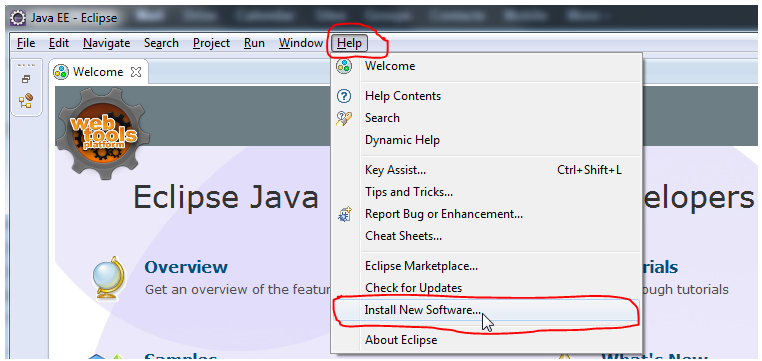
- After installing eclipse, launch eclipse and go to help and click on install software.
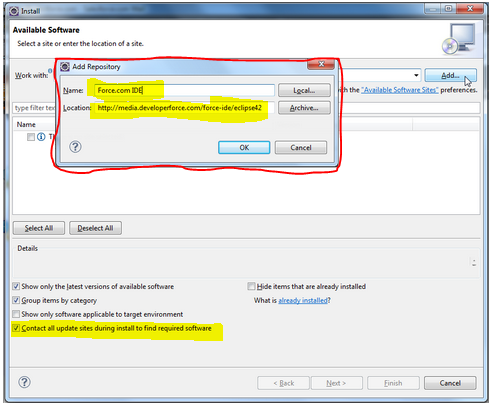
- Click on add, in the add repository dialog window, set the name to “Force.com IDE” and give location to” http://media.developerforce.com/force-ide/eclipse42”. (This URL is for eclipse 4.2 & 4.3).
- Click on OK.
- If you don’t have latest version of the software (java & eclipse), then clear the first checkbox the above screen details section. You will get all available versions of force.com IDE plug-ins & select the check box next to the force.com plug-in you want to install and click on next.
- And click on next & accept terms and conditions and click on finish.
- Eclipse downloads and installs the Force.com IDE and any other required dependencies. When install complete, you will be prompted to restart. Click yes.
- When Eclipse restarts, select Window > Open Perspective > other, select Force.com and click OK.
Now you are ready to develop & customize Force.com applications in Eclipse. Use proxy settings when are working in secured networks. You can find this in General -> Network connection