Visualforce apex:inputfile Tag
In our previous Salesforce Tutorial we have learned about <apex:inputfield> tag and how it works in visualforce page. In this salesforce Training Tutorial we are going to learn about visualforce apex:inputfile tag and how this works when used in visualforce page.
<apex:inputfile> :- apex:inputfile tag is used used to upload documents, images in to salesforce.com. Using this <apex:inputfile> tag we can upload up to 10 MB size document.
Different attributes supported by apex:inputfile tag.
| Accept | accessKey | alt | contentType |
| dir | disabled | filename | filesize |
| id | lang | onblur | onchange |
| onclick | ondbclick | onkeydown | onkeypress |
| onkeyup | onmousedown | onmousemove | onmouseout |
| onmouseover | rendered | size | tabindexed |
| title | value |
Let us see how apex:inputfile tag works.
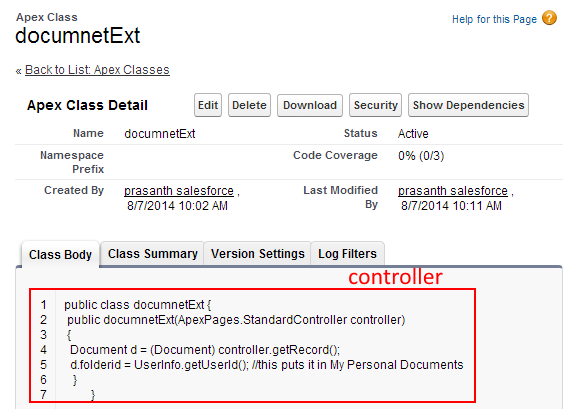
In this apexinpufile tag we have to create controller. To Create a new apex class go to Develop=>apex Class=>New.
[codesyntax lang=”sql” lines_start=”0″ title=”Apex:inputfile Controller”]
public class documnetExt {
 public documnetExt(ApexPages.StandardController controller)
 {
  Document d = (Document) controller.getRecord();
  d.folderid = UserInfo.getUserId(); //this puts it in My Personal Documents
   }
         }
[/codesyntax]
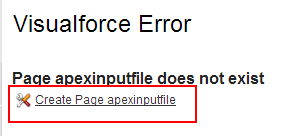
Go to the home URl and add apexinputfile at the ending as shown below
Click on create page apexinputfile to create new Visualforce page.
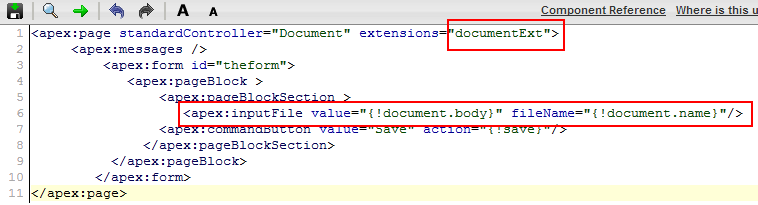
Enter the code as shown below.
In this example we are using controller extension where standard and custom controller are used. DocumentExt is the controller where we have created in Apex class.We also created command button to Save the uploaded file
<apex:inputfile> Output
- Choose file to upload from your local system.
- Select upload button.
- Finally click on Save button.