Salesforce Chatter Publisher
In our previous Salesforce Tutorial we have learned about Work.com Salesforce User Licenses and it’s features. In this Salesforce Administration Tutorial we are going to learn about how to add thanks button in Salesforce chatter publisher.
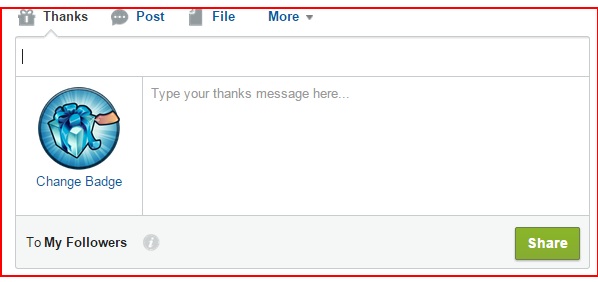
Here we are trying to change the position of the Thanks button in Salesforce Chatter publisher . Generally thanks button helps us to convey our Thanks message to specific profile, users in an organization. We can make Thanks button hide or Show to specific profiles and users in an organization.
How to Add Thanks button in Salesforce Chatter Publisher.
To add thanks button in Salesforce Chatter publisher we have follow the steps given below
- First enable Publisher actions in Salesforce.
- Create Global actions in publisher layouts.
- Now rearrange thanks button to the required position in Salesforce chatter publisher.
How to enable publisher actions.
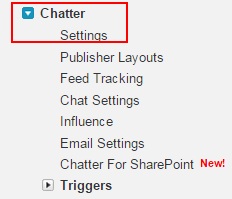
- Go to Setup=>Customize=>Chatter=>Settings.
Click on Settings as shown above. Then we are taken to new page where we have to enable publisher actions in Salesforce.
- Now to publisher actions in the settings and make sure to check Enable Publisher actions check box as shown below.
After enabling click on Save button.
- Now go Setup.
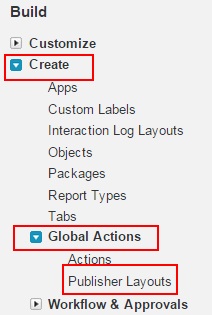
- Now go to Build=>Create=>Global Actions=>Publisher Layouts.
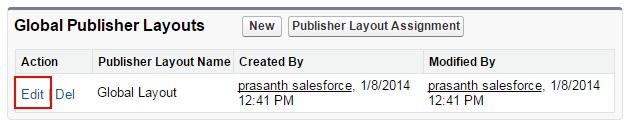
Select publisher layout to move the position of the Salesforce Chatter Publisher thanks button.
- Click on Edit button.
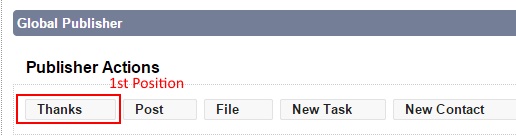
Now go to Global Publisher section and click on Thanks button then drag to the desired position as shown above. In this Example Salesforce Chatter publisher thanks buttons is originally placed in 7th position and we moved that button to 1st position as shown below.
Now go Chatter Tab.
We have successfully added Salesforce Chatter publisher thanks button.