
Case Assignment Rules in Salesforce Service Cloud automate the process of assigning cases to users or queues based on defined criteria. This ensures that cases are routed to the appropriate team or individual for resolution, improving efficiency and response times.
Creating Case Assignment Rules in Salesforce
To set up an assignment rule, you define criteria that determine how cases are assigned.
Steps to Create a Case Assignment Rule
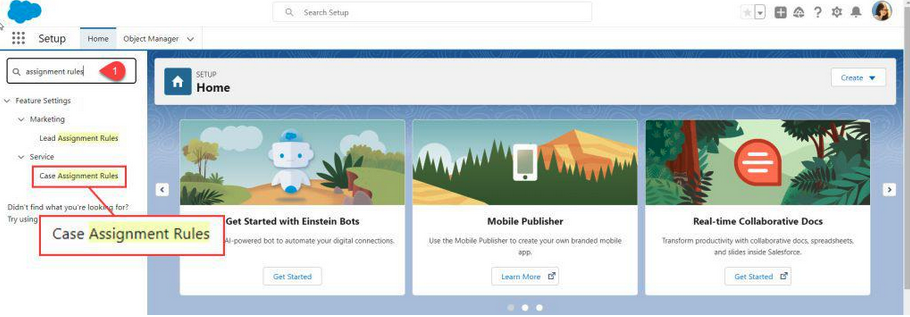
1. Navigate to Case Assignment Rules
- Go to Setup:
- Click the Gear icon in the top-right corner and select Setup.
- Find Case Assignment Rules:
- In the Quick Find box on the left, type Case Assignment Rules.
- Select Case Assignment Rules under Feature Settings > Service > Support Processes.
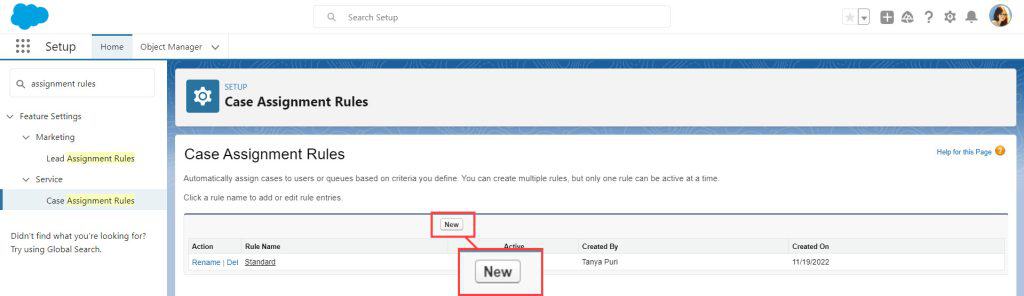
2. Create a New Assignment Rule
- Click on New:
- On the Case Assignment Rules page, click the New button.
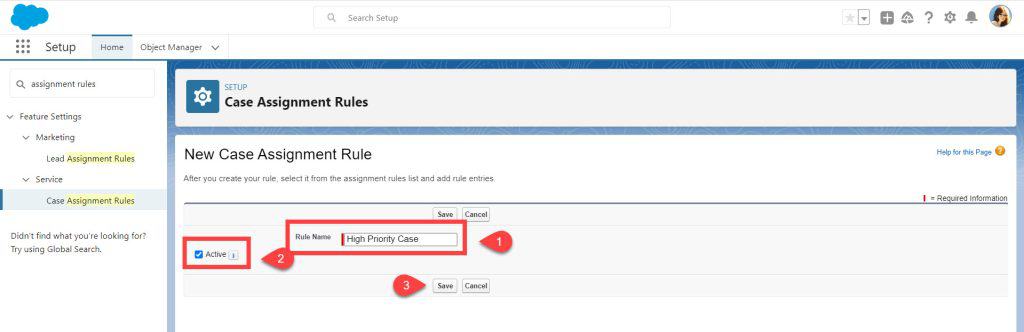
- Define Rule Details:
- Rule Name: Enter a name, e.g., Default Case Assignment.
- Active: Check this box to make the rule active.
- Click Save.
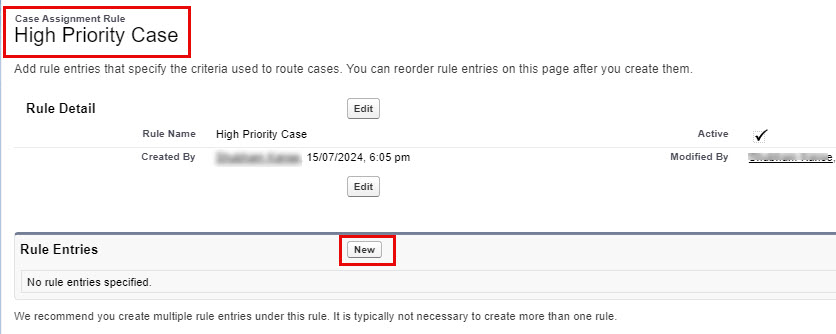
3. Define Rule Entries
- Access the Rule:
- Click on the name of the rule you just created.
- Add a New Rule Entry:
- In the Rule Entries related list, click New.
- Set Rule Entry Details:
- Sort Order: Enter the order for evaluation (e.g., 1, 2).
- Criteria: Define the conditions that must be met for the rule to apply. For example:
- Field: Case: Case Origin
- Operator: equals
- Value: Email
- Assign To: Choose User or Queue. If assigning to a queue, select the relevant queue.
- Email Template: (Optional) Select an email template for notifications.
- Click Save.
Example Rule Entries
Below is an example of how to set up rule entries:
| Sort Order | Criteria (Case Origin) | Assign To | Email Template |
|---|---|---|---|
| 1 | High Priority Queue | Case Assignment Notification | |
| 2 | Phone | Support Agent | Case Assignment Notification |
- Sort Order: Determines the sequence in which the rules are evaluated.
- Criteria (Case Origin): The condition that triggers the rule.
- Assign To: The user or queue to which the case is assigned.
- Email Template: The template used to notify the assignee.
By setting up these rules, you ensure that cases are automatically routed based on their origin or other criteria, reducing manual effort and potential delays.
Activating the Assignment Rule
- Ensure the Rule is Active:
- Only one case assignment rule can be active at a time.
- Confirm that your assignment rule is marked as Active.
- Important for Manual Case Creation:
- For the assignment rules to trigger when creating cases manually, ensure that the Assign using active assignment rules checkbox is visible and selected on the case page layout.
How to Display the “Assign using active assignment rules” Checkbox
- Navigate to Case Page Layouts:
- Go to Setup > Object Manager > Case > Page Layouts.
- Edit the Desired Page Layout:
- Click Edit next to the page layout you want to modify.
- Add the Checkbox:
- Click on Layout Properties at the top of the page.
- Under Case Assignment Checkbox, check the following:
- Show on edit page
- Default to checked
- Click OK.
- Save the Layout:
- Click Save to apply the changes.
Summary
By configuring Case Assignment Rules, you automate the routing of cases to the appropriate users or queues based on predefined criteria. This streamlines your support process, reduces response times, and ensures that customer issues are handled efficiently.