
After activating the Service Setup Assistant in Salesforce, there are essential steps to finalize your Service App configuration. These steps ensure that your support processes are streamlined and your team is equipped to deliver exceptional customer service.
Service App Setup in Salesforce Step by Step
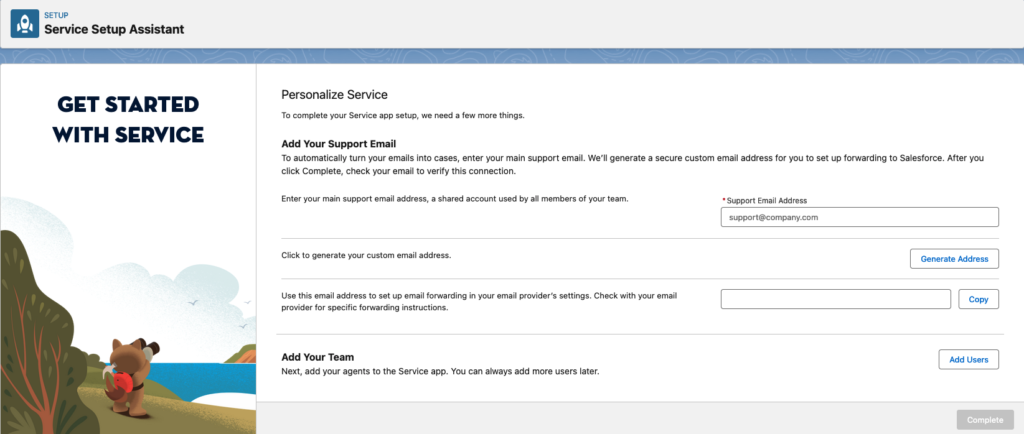
1. Add Your Support Email
To automatically convert incoming support emails into cases, integrate your main support email address with Salesforce.
Steps:
- Enter Support Email Address:
- In the setup interface, locate the field labeled Support Email Address.
- Input your primary support email, which is the shared address your support team uses to receive customer inquiries.
- Generate Custom Email Address:
- Click on the button labeled Generate Address.
- Salesforce will provide a unique email address.
- Set Up Email Forwarding:
- Access your email provider’s settings to configure forwarding.
- Forward all emails from your support address to the custom email address generated by Salesforce.
- Refer to your email provider’s documentation for specific instructions on setting up email forwarding.
- Verify the Connection:
- After configuring forwarding, Salesforce may send a verification email to your support address.
- Follow the instructions in the email to confirm and activate the connection.
By completing these steps, all emails sent to your support address will be automatically converted into cases within Salesforce, enabling efficient tracking and resolution.
2. Add Your Team
Integrate your support agents into the Service App to ensure they have the necessary access and tools.
Steps:
- Access User Management:
- Navigate to the Add Users section in the setup interface.
- Enter User Details:
- For each team member, input their email address.
- Assign an appropriate profile:
- Service Admin: For users who will manage and configure the Service App.
- Service Agent: For users who will handle customer cases and interactions.
- Assign Feature Licenses and Queues:
- Select the necessary feature licenses for each user based on their role.
- Assign users to relevant queues to manage case distribution effectively.
- Complete User Addition:
- After entering all necessary information, click Complete to finalize the addition of users.
Adding your team members ensures they have access to the Service App and can begin managing customer cases promptly.
Finalizing the Setup
Once you’ve added your support email and team members:
- Review Configurations: Ensure that all settings align with your organization’s support processes.
- Test the Setup: Send a test email to your support address to verify that it creates a case in Salesforce and is routed correctly.
- Train Your Team: Provide training to your agents on using the Service App effectively, including how to manage cases and utilize available tools.
Conclusion
Completing Your Service App Setup in Salesforce is a pivotal step toward enhancing your customer support operations. By integrating your support email and onboarding your team, you establish a streamlined process for managing customer inquiries and cases. This foundation enables your support agents to operate efficiently, leading to improved customer satisfaction and loyalty.