Salesforce Communities:
Salesforce Communities are very useful for employees, customers and partners to connect in one place. We can create and customize communities according to our requirement. Communities was released in summer’ 13 release.
You can collaborate and communicate with people outside of your company who are key to business. We can easily communicate with internal users and portal users and external users.
We can create multiple communities in an organization. For example for partner support you can create one community and for customer support you create one more community. Like based on your business need you can create multiple communities.
Salesforce Communities are useful to:
– Drive more sales by connecting your employees with your distributors, resellers, and suppliers
– Deliver world-class service by giving your customers one place to get answers
– Manage social listening, content, engagement, and workflow all in one place
Here in this post I will explain you how to enable community and how to create communities.
How to enable community in Salesforce?
To enable community in Salesforce go to setup -> Build -> Customize -> Communities and click on settings. and check enable communities check box and enter your domain name and save it.
Note: You cannot change your domain name once you save it. This domain name will be used in all of your communities.
See the below screen for reference.
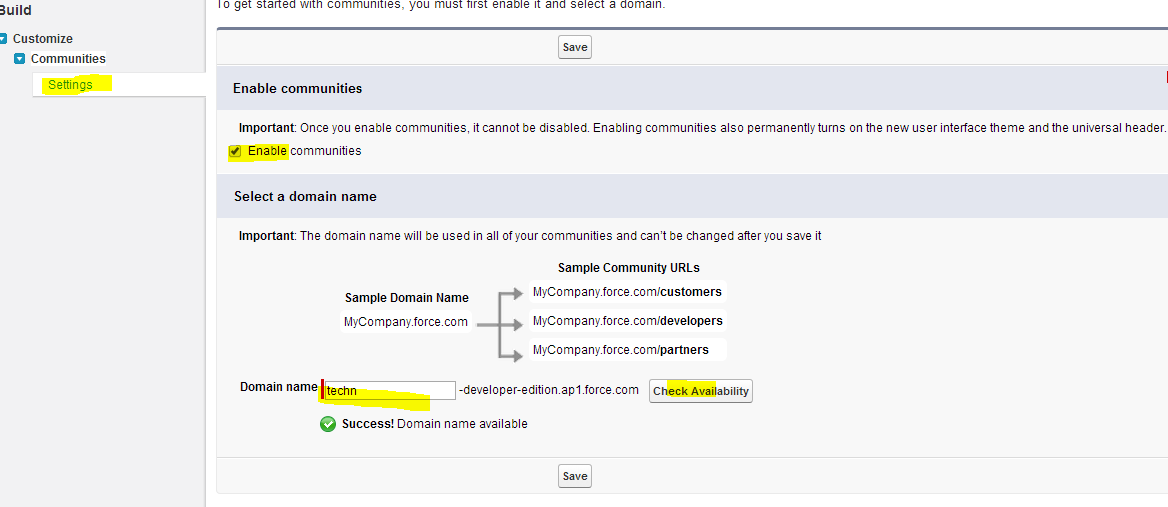
in the above screen Check availability button is used to, the domain entered by you is available or not.
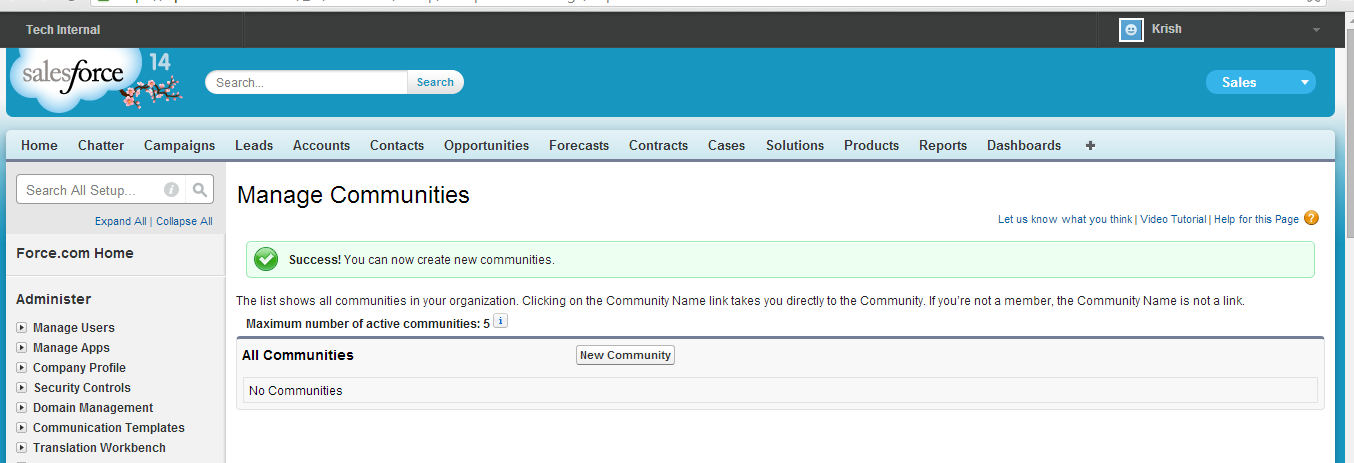
Once communities is enabled new header will be enabled in your salesforce org, there you can swipe between multiple communities. See the below screen for reference.
Now communities are enabled. We will see how to create communities.
How to create communities in salesforce?
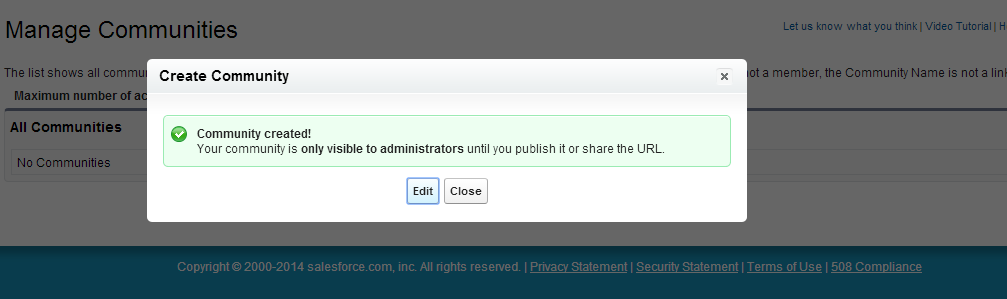
To create communities go to setup -> Build -> Customize -> Communities -> Manage Communities -> and click on New communities button . And enter name, description and url and click on create button.
How to manage community?
Once community is created, that is only visible to only administrators until you publish it or share the URL. After creating the community you will navigate to following screen.
Click on EDIT button to manage the community you just created. After clicking on edit you will be navigate to below screen.
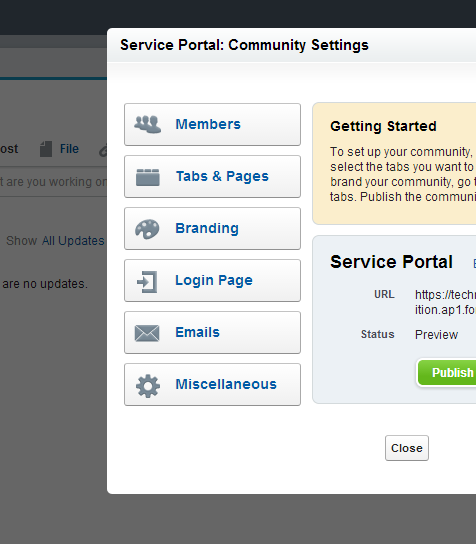
Members is used to add members to the community.
Tabs & pages button is used to manages Which tabs are available to the community and overriding home page with visualforce page.
Branding button is used add header, footer and to change colors.
Login Page button is used to add logo to your community and also we can define login options for external users.
Email button is used to specify sender email to notifications, chatter email branding and email templates.
Miscellaneous button is used to flagging contents, enable private messages and enable knowledgeable people on topics.
Once you defined all your community settings you can publish your community.
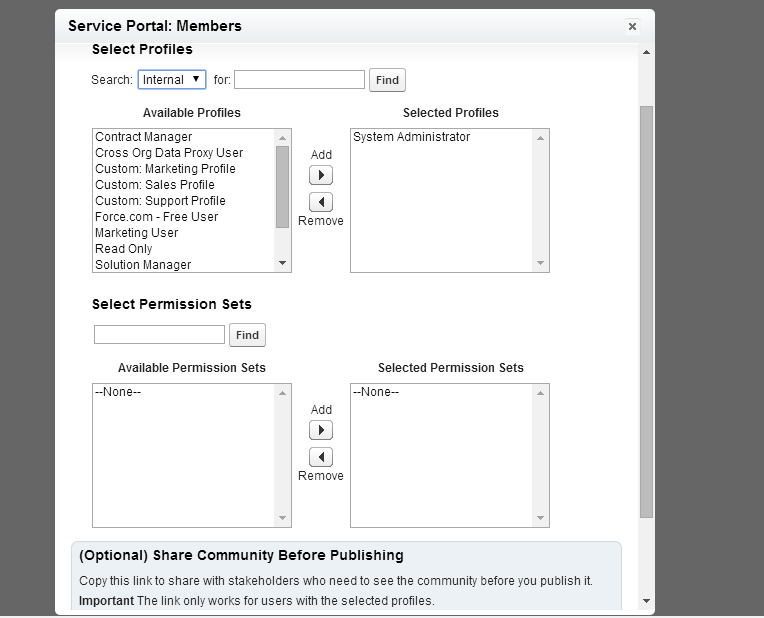
How to add members to your salesforce communities?
Based on the profiles and permission sets we can add members to the Salesforce communities.
To add members to your Salesforce communities go to Setup -> Build -> customize -> Community -> manage community -> and edit your community and click on Members and add profiles or permission sets you want give access to community.
See the below screen for reference.