
Creating custom reports in salesforce : In our previous salesforce tutorial we have created standard reports in salesforce. In this crm salesforce training tutorial we are going to learn how to create custom report types in salesforce.
Creating custom reports in salesforce
Before creating custom reports types in salesforce we should follow some steps. They are
- Define custom report type template.
- select related object.
- Specify the layout to display custom fields in custom report type.
- Create a report from the custom report type template to verify that the object and field definitions are correct or not.
If we delete custom report types template that we created and the reports in that custom report type template will also be deleted . Dashboards which are created from that report types will show error message when we try to view that deleted custom report types dashboard.
Step 1:- Defining custom reports in salesforce.
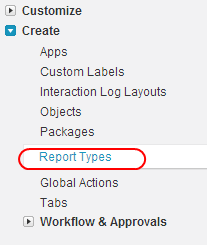
To define custom reports in salesforce follow the path Setup=>Create=>Report types.
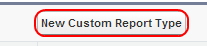
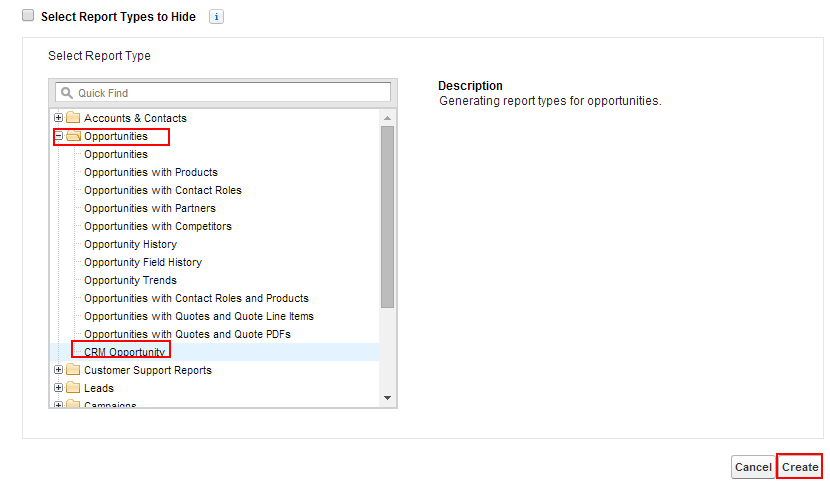
Now select new custom report type as shown below.
Now we are taken to new page which we are required to define report type template .Enter primary object name from the drop -down list, Report type label, report type name, Description, store in category all these fields are required. After saving custom report type template we can not change primary object name. Report type label field can be up to 50 characters long and description can be up to 255 characters long.
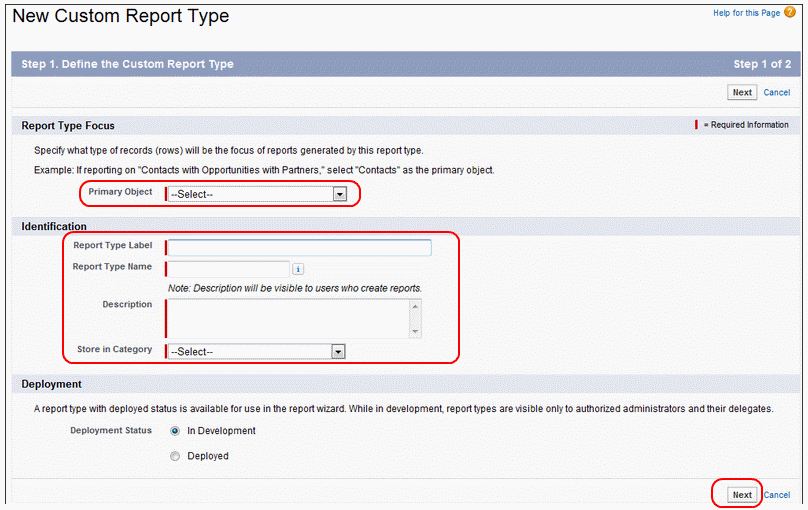
Now select Next.
Step 2 :- Defining report records set.
Select object relationship which will be displayed when we run custom report type. Relationships determines the object and the fields to be displayed when we run a report.
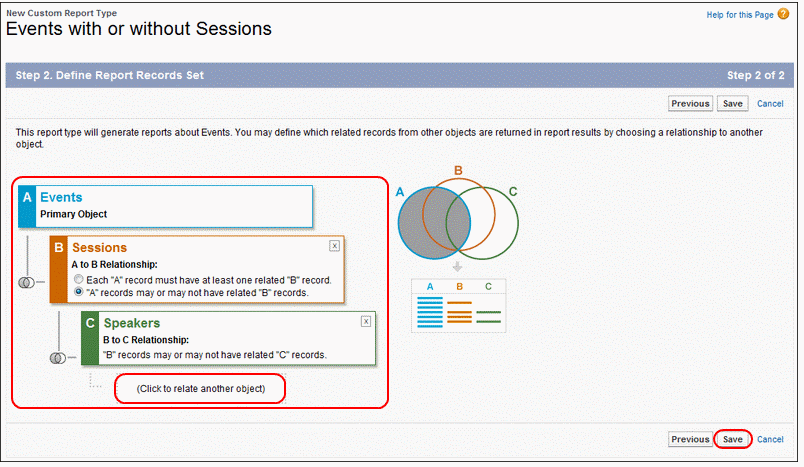
In this example Event Object has relationships with sessions and speaker. To enter relationships click to relate another object as shown above and select from the pick list. Objects associated with primary object can only be selected as secondary object.
Select save button.
step 3 :- Specify the layout to display custom fields in custom reports in salesforce.
After saving we are taken to detailed view of the custom report. In this step we have to edit the custom report to specify which standard and custom fields a report can display when we run a report.
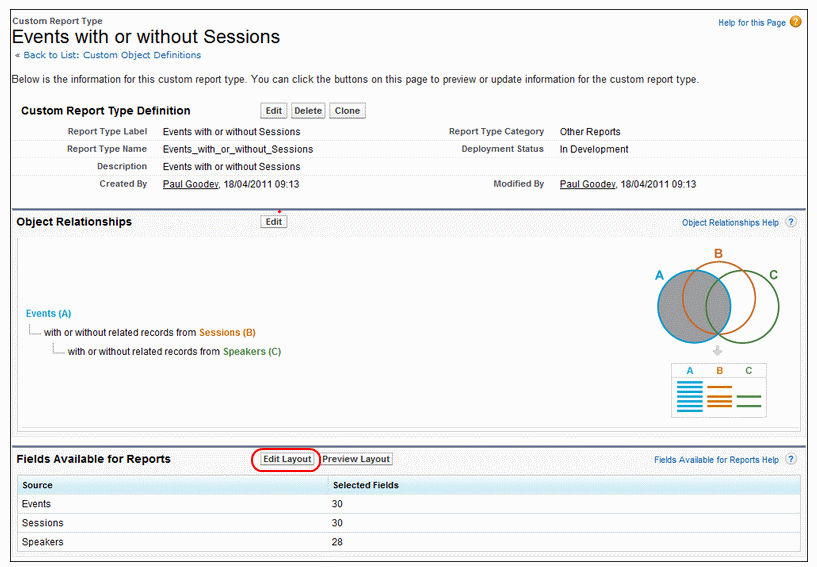
Select Edit layout button as shown above.
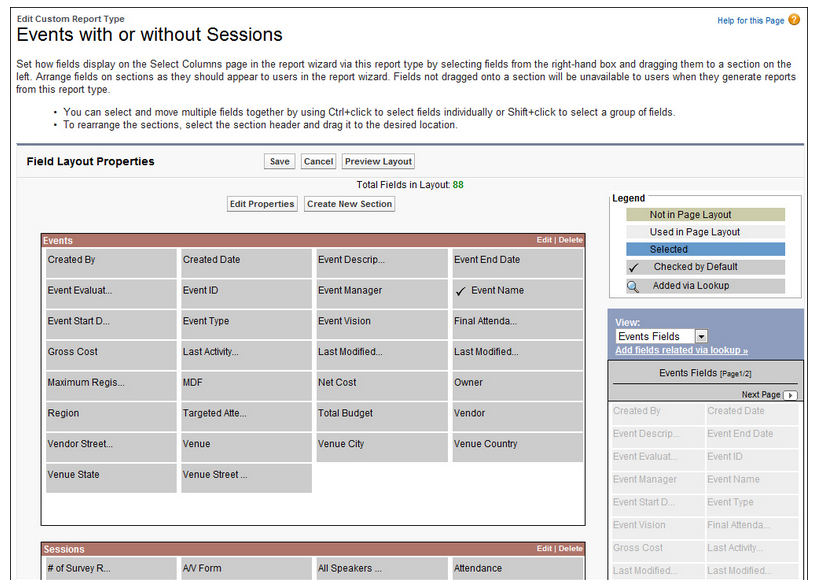
Select object fields from View which is at right hand side and arrange the fields in order as you wish. We can add up to 1000 fields to each custom report type template in salesforce.
Select Edit Properties to rename or to set fields.
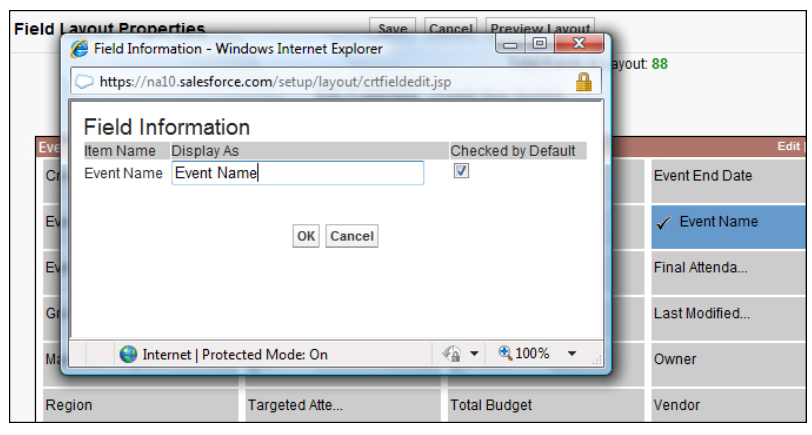
Now select Checked by default check box and the name you want then click on OK and Save all the settings you made.
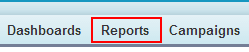
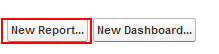
Now go to Report Tab.
Now Select New Report.
Now we are taken to new screen.
Now go to the report folder and select that report to create Report. Click on report as Shown above.
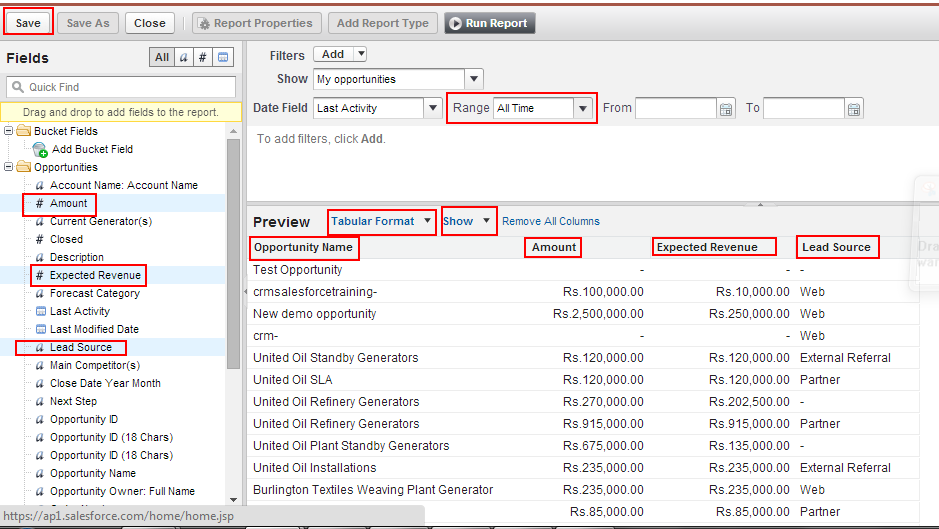
Select the fields from left panel and drop on the Header as shown above.
- Select the Format.
- Click on Show to display the fields.
- Clear Date Range and select as All.
- Now finally Save the settings.
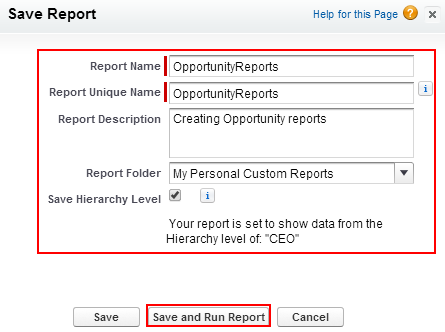
- Enter report name.
- Report description.
- Select the folder to save the report.
- Now Save and Run the report.
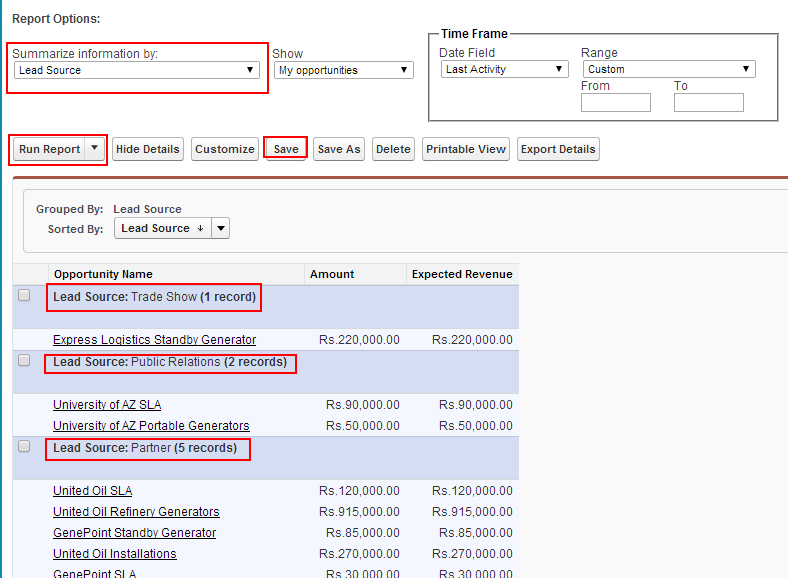
- Select the summarized information by any of your required field.
- Run the Report.
- Save the report.
Note :- “With out selecting summarized information by any field and report and is saved. When we creating dashboards for this report we get Error as this report cannot be used as the source for this component. If it is a summary or matrix report, add one or more grouping in the report. If it is a tabular report with a row limit, specify the Dashboard settings in the report.”