
Force.com Explorer : In our Previous Salesforce tutorial we have learned about SOQL Syntax. In this Salesforce Training Tutorial we are going to learn How to download and Install Force.com explorer Software to write our first SOQL Statement. In order to execute SOQL Statements we have to use some tools. Those tools are downloaded, installed and integrated with our salesforce.com account.
Force.com Explorer Software
The Force.com Explorer is a Windows only tool offering the same functionality as Schema Explorer and more functions. The password that Force.com Explorer expects is our password concatenated with your security token i.e. if your password is “Password” and your token is “Token” then your Force.com Explorer password is “PasswordToken”. You’ll find that if a tool does not explicitly ask for a token it assumes that you supply it with this concatenated password instead.
- Find more details on Security Tokens here.
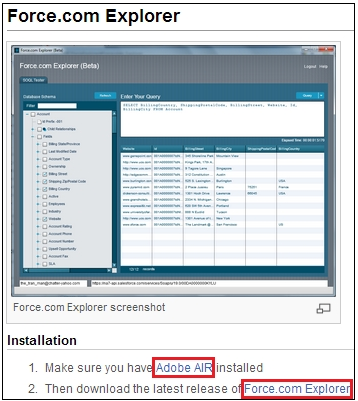
Before installing Force.com Explorer we have download and install AIR application (Adobe AIR). After installing AIR application only we have to install Explorer software. By Using Force.com Explorer software we can import data to CSV Format, export data from CSV format to Salesforce.com.
Basically Explorer Software is used to import and export smaller set of records only. For bulk operation we use Apex Data Loader.
Downloading Force.com Explorer Software.
- To Download Explorer software go to the following link http://wiki.developerforce.com/page/ForceExplorer.
- Now Download Adobe AIR.
- Install Adobe Air application.
- Now Install Force.com Explorer Software. With out installing Adobe AIR we can not install Force.com Explorer software.
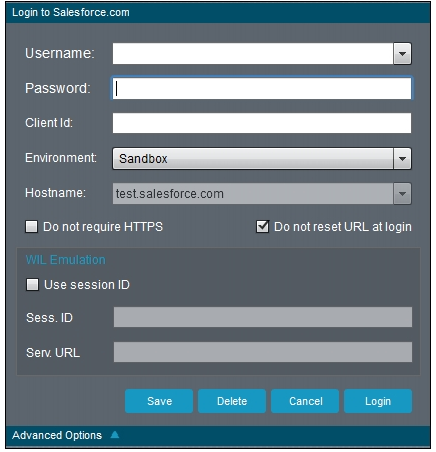
After Installing Explorer Software open Force.com Explorer software from the Start Menu.
- Enter Username and Password.
- Password is the combination of Password and Security token.
- Select Environment as Production or Developer Edition.
- Select Login Button.
- To Enter SOQL Query Statement go to Query option.
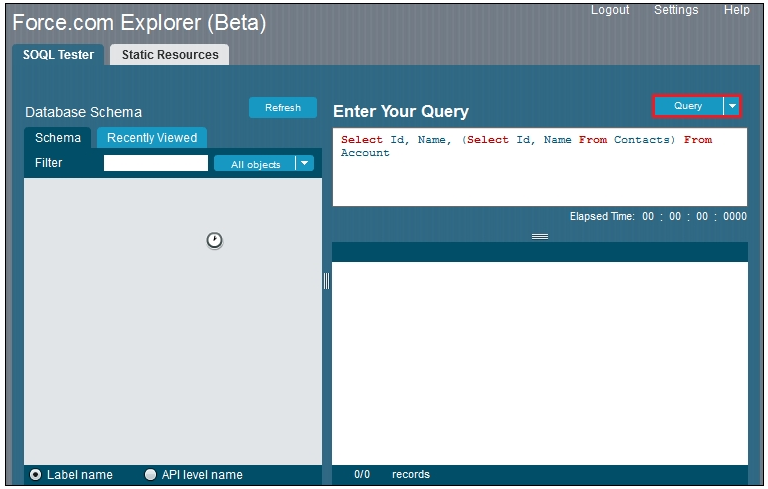
Write your SOQL query as shown above and click on Query button.